This guide walks you through every method, step by step, so you can gather the data you need and make an informed decision before committing to a replacement.
Why Confirming Differential Fitment Matters
A differential that looks similar to your original may differ in critical ways: gear ratio, spline count, axle flange bolt pattern, housing diameter, or mounting configuration. Installing an incompatible differential can cause:
- Drivetrain vibration or noise
- Premature wear on axles and gearsets
- Complete drivetrain failure
- Safety hazards during operation
Getting fitment right the first time protects your investment and keeps the vehicle performing as designed.
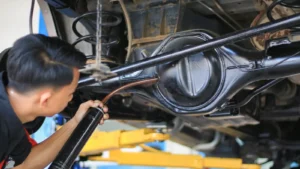
Method 1: Read the Differential ID Tag
Where the Tag Is Located
Depending on your vehicle and differential type, the ID tag is typically found:
- On the differential housing — attached by one of the cover bolts or a riveted plate on the side or top of the housing
- Stamped directly into the axle tube — near the differential center section
- On the inspection cover — sometimes printed or embossed on the removable rear cover
What to Look for on the Tag
| Field | What It Means |
|---|---|
|
Part / Model Number |
Identifies the exact differential unit |
|
Gear Ratio |
e.g., 3.73, 4.10 — must match your replacement |
|
Build Date |
Useful for confirming production-era compatibility |
|
Ring Gear Diameter |
Critical for housing and axle compatibility |
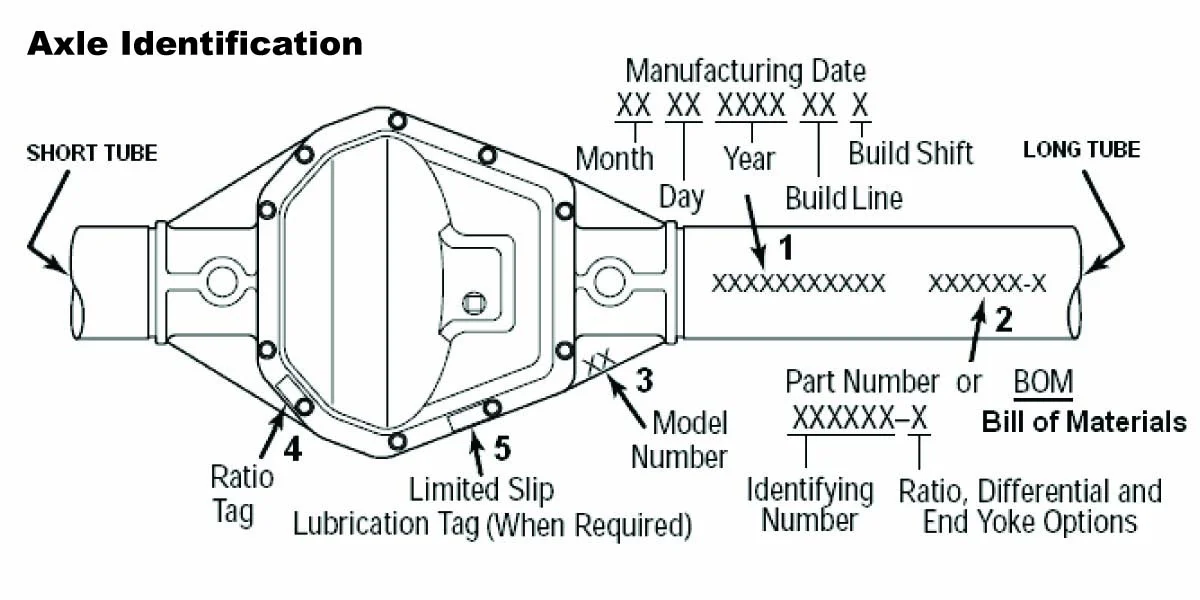
How to Read Differential Tags?
Identifying a vehicle’s differential correctly is a non-negotiable step in repairs, upgrades, or part replacements.
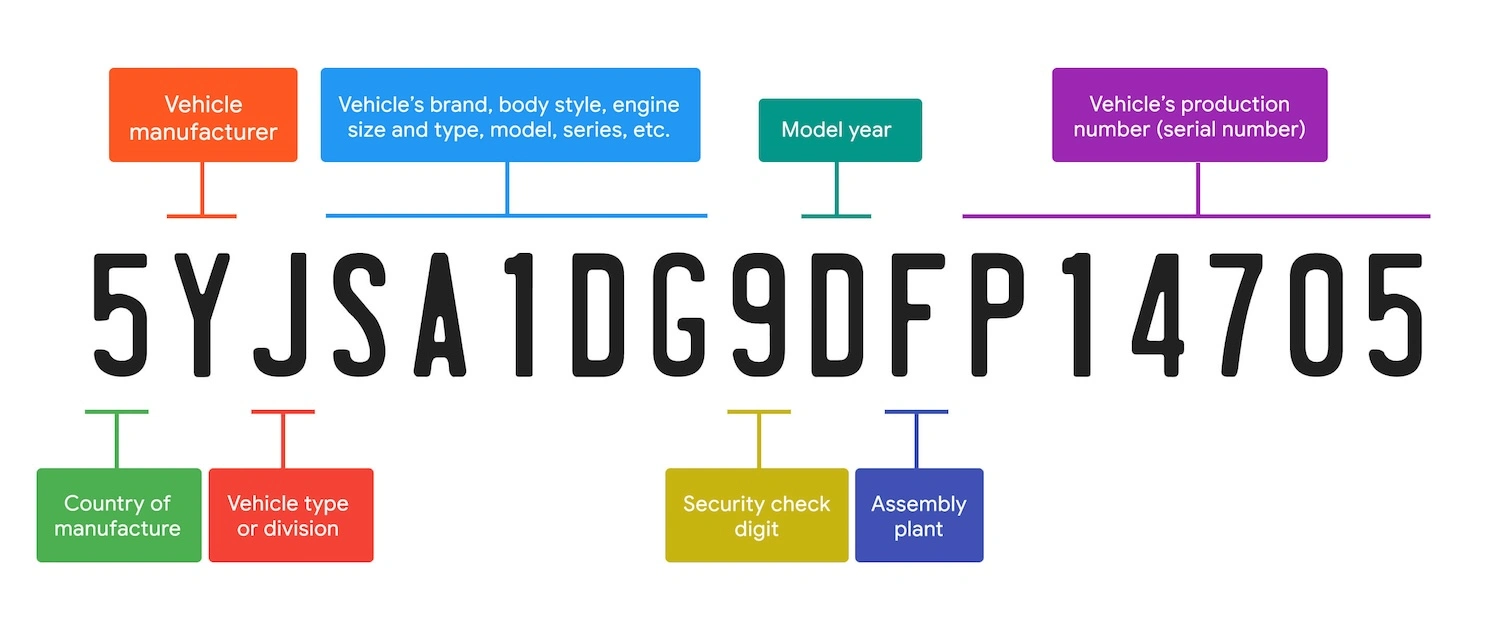
Method 2: Decode Your VIN (Vehicle Identification Number)
Where to Find Your VIN
- Driver’s side dashboard (visible through the windshield)
- Driver’s door jamb sticker
- Vehicle registration and insurance documents
- Engine bay firewall
What the VIN Tells You
Action steps:
- Locate and record your full 17-digit VIN.
- Use a reputable VIN decoder (your OEM dealer, or VIN Decoder website).
- Note the axle ratio code or drivetrain option code listed in the decoded results.
- Cross-reference this code against the differential manufacturer’s fitment guide to retrieve the original spline count and housing outer diameter for your vehicle.
An important note for used vehicle owners:
VIN decoding reflects the vehicle’s original factory configuration — not its current state. If you purchased a used vehicle and cannot confirm whether the previous owner modified the drivetrain, the VIN data may no longer be accurate. Aftermarket axle swaps, gear ratio changes, or differential upgrades are common modifications that would not be reflected in the VIN.
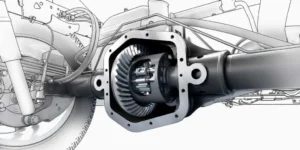
Method 3: Check the Axle Housing and Cover Bolt Pattern
Identify the Cover Shape
The overall shape of the differential cover is often the quickest visual identifier:
- Oval or rounded covers are commonly associated with lighter-duty differentials found in passenger cars and smaller trucks (e.g., GM 7.5″, Ford 8.8″ in some configurations)
- Flat-bottom or D-shaped covers are typical of mid-range truck differentials such as the Dana 44 and some Chrysler units
- Irregular or asymmetrical covers (with one flat edge or a distinct bulge) are characteristic of certain Dana and AAM heavy-duty units
- Perfectly round covers are often seen on older or simpler axle designs
That said, cover shape alone is not reliable enough to make a final call — different manufacturers have produced differentials with similar shapes but entirely different internal specifications.
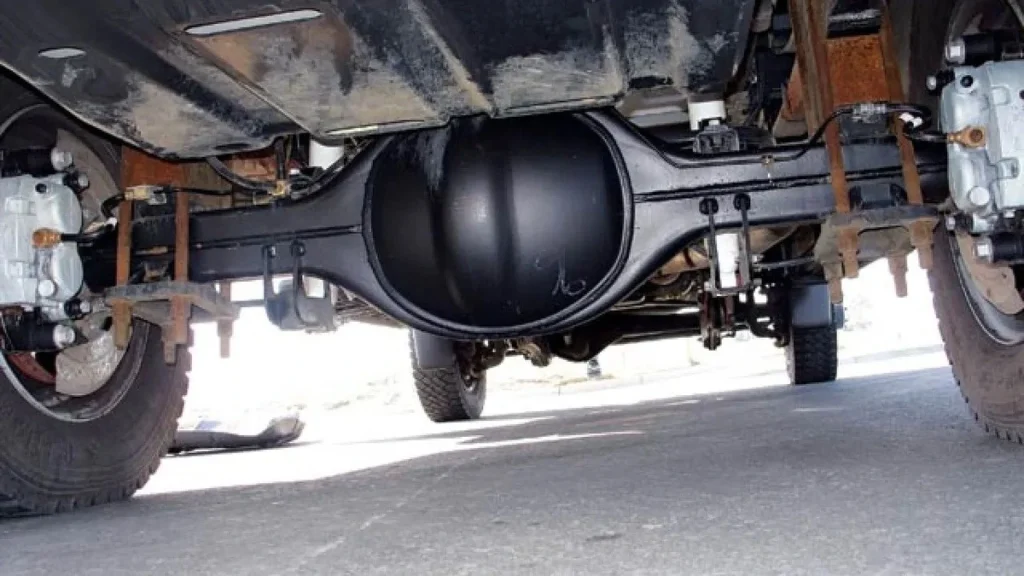
Count the Cover Bolts
The number of bolts on the differential cover is one of the most consistent ways to narrow down the differential family:
- 10-bolt cover → Common on GM light trucks and passenger cars (e.g., GM 8.5″, GM 7.5″)
- 12-bolt cover → GM heavy-duty trucks (GM 8.875″)
- 10-bolt Dana style → Ford Dana 44 variants
- Ring of 10 or 12 with a specific pattern → Chrysler 8.25″, 9.25″
Count the bolts on your existing differential cover and compare against the replacement unit’s specification sheet.
Measure the Cover Dimensions
Using a tape measure or calipers (accessible without removal in most installations):
- Measure the outer diameter of the differential cover
- Measure the bolt circle diameter (distance across opposing bolt holes)
- Compare these measurements to the replacement unit’s published specs
While this does not give you the housing outer diameter with precision, it provides a strong indirect reference point. A significant mismatch in cover diameter almost always indicates a mismatch in the underlying housing size — helping you rule out clearly incompatible units before moving to more precise verification methods.
Method 4: Verify Gear Ratio via Axle Tag or Wheel Rotation
Option A: Read the Ratio from the Tag
Option B: The Wheel Rotation Method (No Removal Required)
This is a simple field test you can perform with the vehicle on jack stands:
- Safely lift the rear (or front, for front differentials) of the vehicle with both drive wheels off the ground.
- Mark the driveshaft with a piece of tape or chalk at the 12 o’clock position.
- Mark one tire at the 12 o’clock position as well.
- Rotate the marked tire exactly two full revolutions while counting how many times the driveshaft rotates.
- The number of driveshaft rotations = your approximate gear ratio.
Method 5: Confirm Spline Count and Axle Diameter
How to Check Spline Count Without Removal
On most solid axle vehicles, you can remove the axle shaft without touching the differential itself:
- Remove the wheel and brake drum or rotor.
- Remove the axle retaining plate or C-clip (depending on design).
- Pull the axle shaft partially out — far enough to count the splines on the shaft end.
- Slide it back in once counted.
Conclusion
Have questions about sourcing the right differential for your application? Our team specializes in custom and OEM-replacement differentials for a wide range of vehicles. Contact us for expert fitment support.